
A good Chat Widget should feel like part of your website, not like a separate box pasted on top of it.
KaoJai.ai Chat Widget is now more customizable from Admin. You can adjust the appearance, messages, and conversation starters so customers can begin a conversation in a way that feels closer to your website and brand, while your team continues receiving messages in the same Unified Inbox.
What can you customize?
| Setting | What it does | Useful for |
|---|---|---|
| Header title | Set a custom title up to 80 characters | Show your shop, team, or campaign name |
| Header subtitle | Add a multiline description up to 160 characters | Tell visitors what they can ask about |
| Launcher message | Add a multiline greeting or invitation up to 240 characters | Invite visitors to start a conversation |
| Primary color | Choose the accent color used by the launcher and chat highlights | Match the Widget to your website |
| Logo | Provide an HTTP(S) image URL | Use your shop or brand logo in the launcher and header |
| Starter keywords | Add up to five reorderable buttons | Help customers start with common questions |
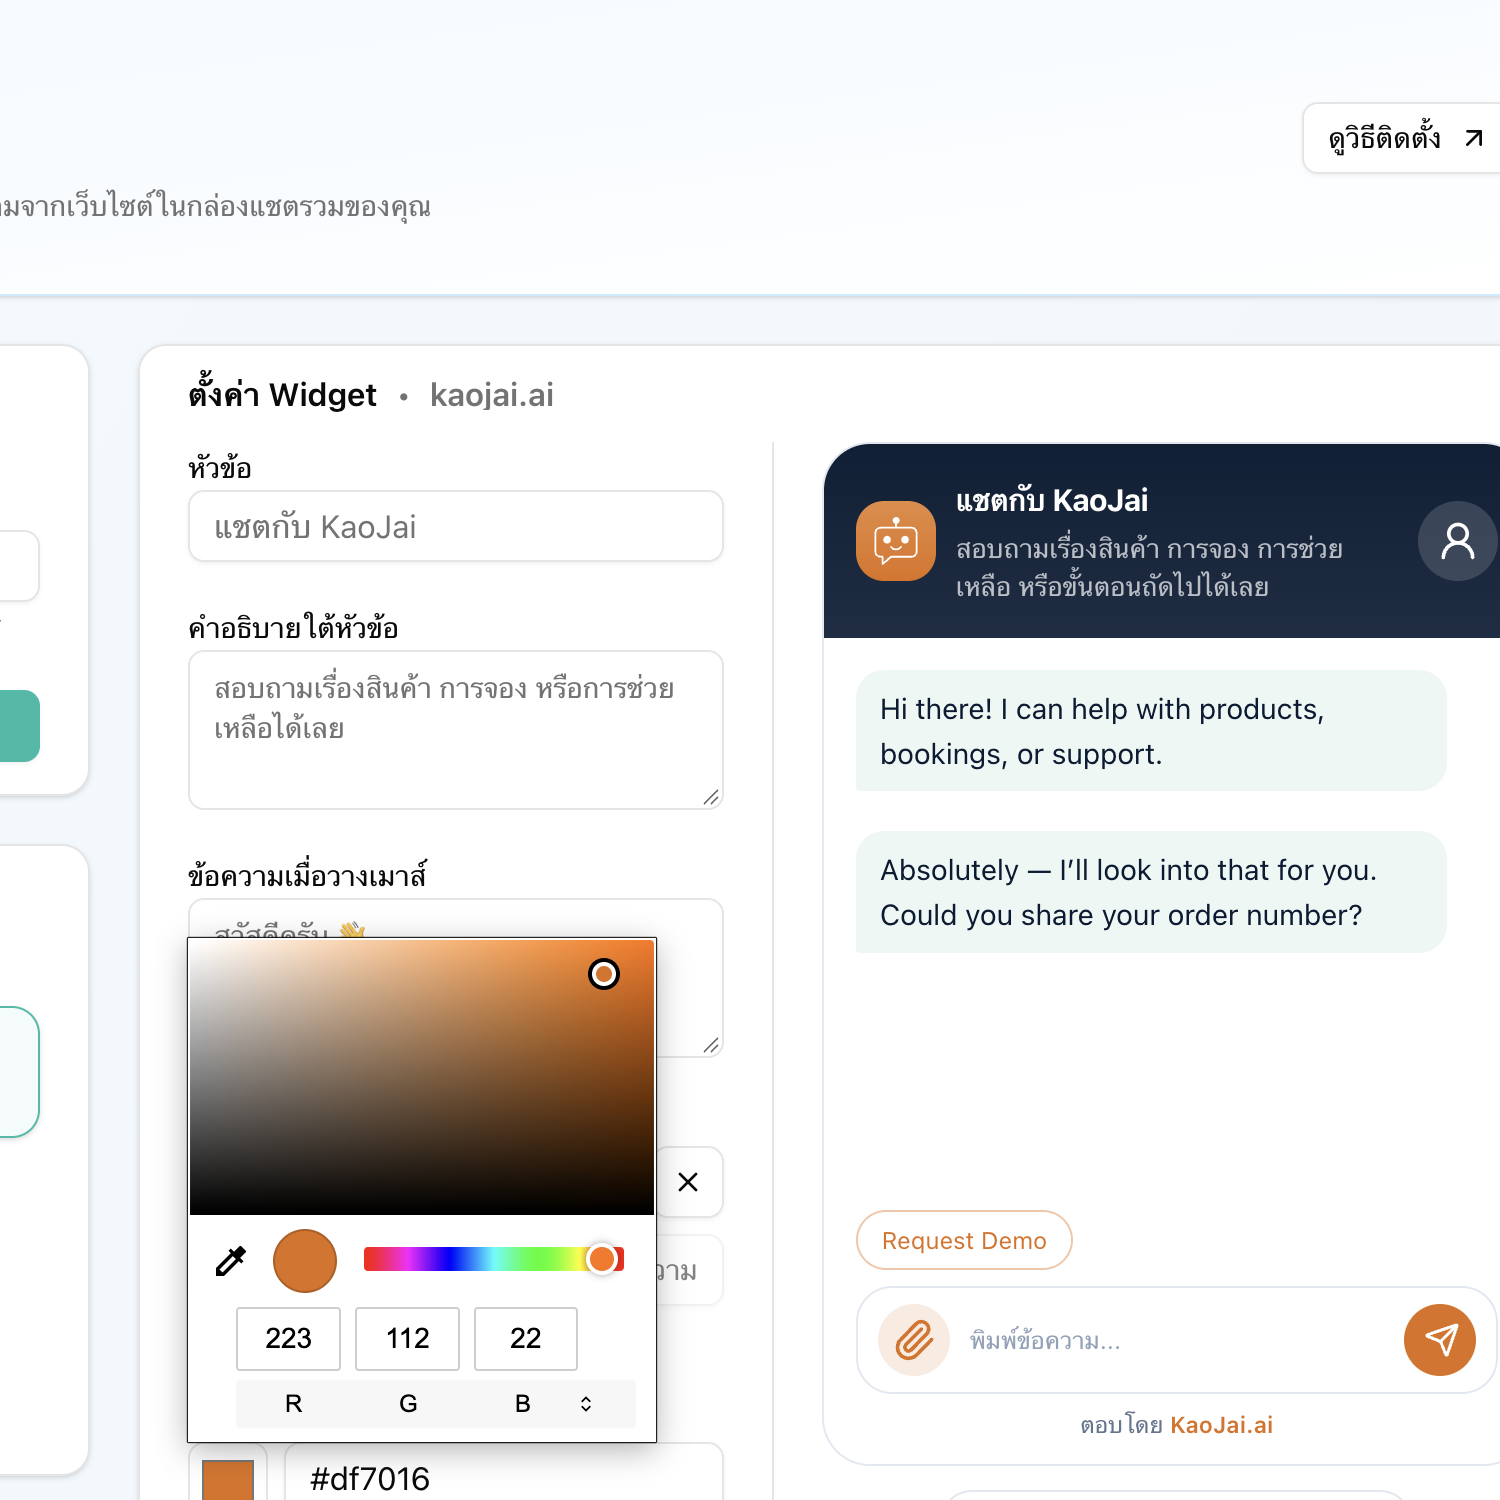
Customize the Widget and review the result beside the settings on the same screen.
When you do not provide a logo, the Widget uses the KaoJai logo by default. If a custom image fails to load, it falls back to the KaoJai logo so the launcher never becomes an empty space.
Help customers start with one tap
Some visitors want to ask a question but are not sure how to begin. Starter keywords remove that hesitation. For example:
- Ask about packages
- Check my order status
- Request a quotation
- Book an appointment
- Talk to a team member
You can add up to five buttons per Widget. Each keyword can be up to 80 characters, and you can edit, remove, and reorder them so the most useful option appears first.
When a visitor clicks a button, the Widget sends the full configured text into the conversation, rather than only the shortened visual label. The buttons appear before the visitor sends their first message, then disappear so the conversation stays focused.
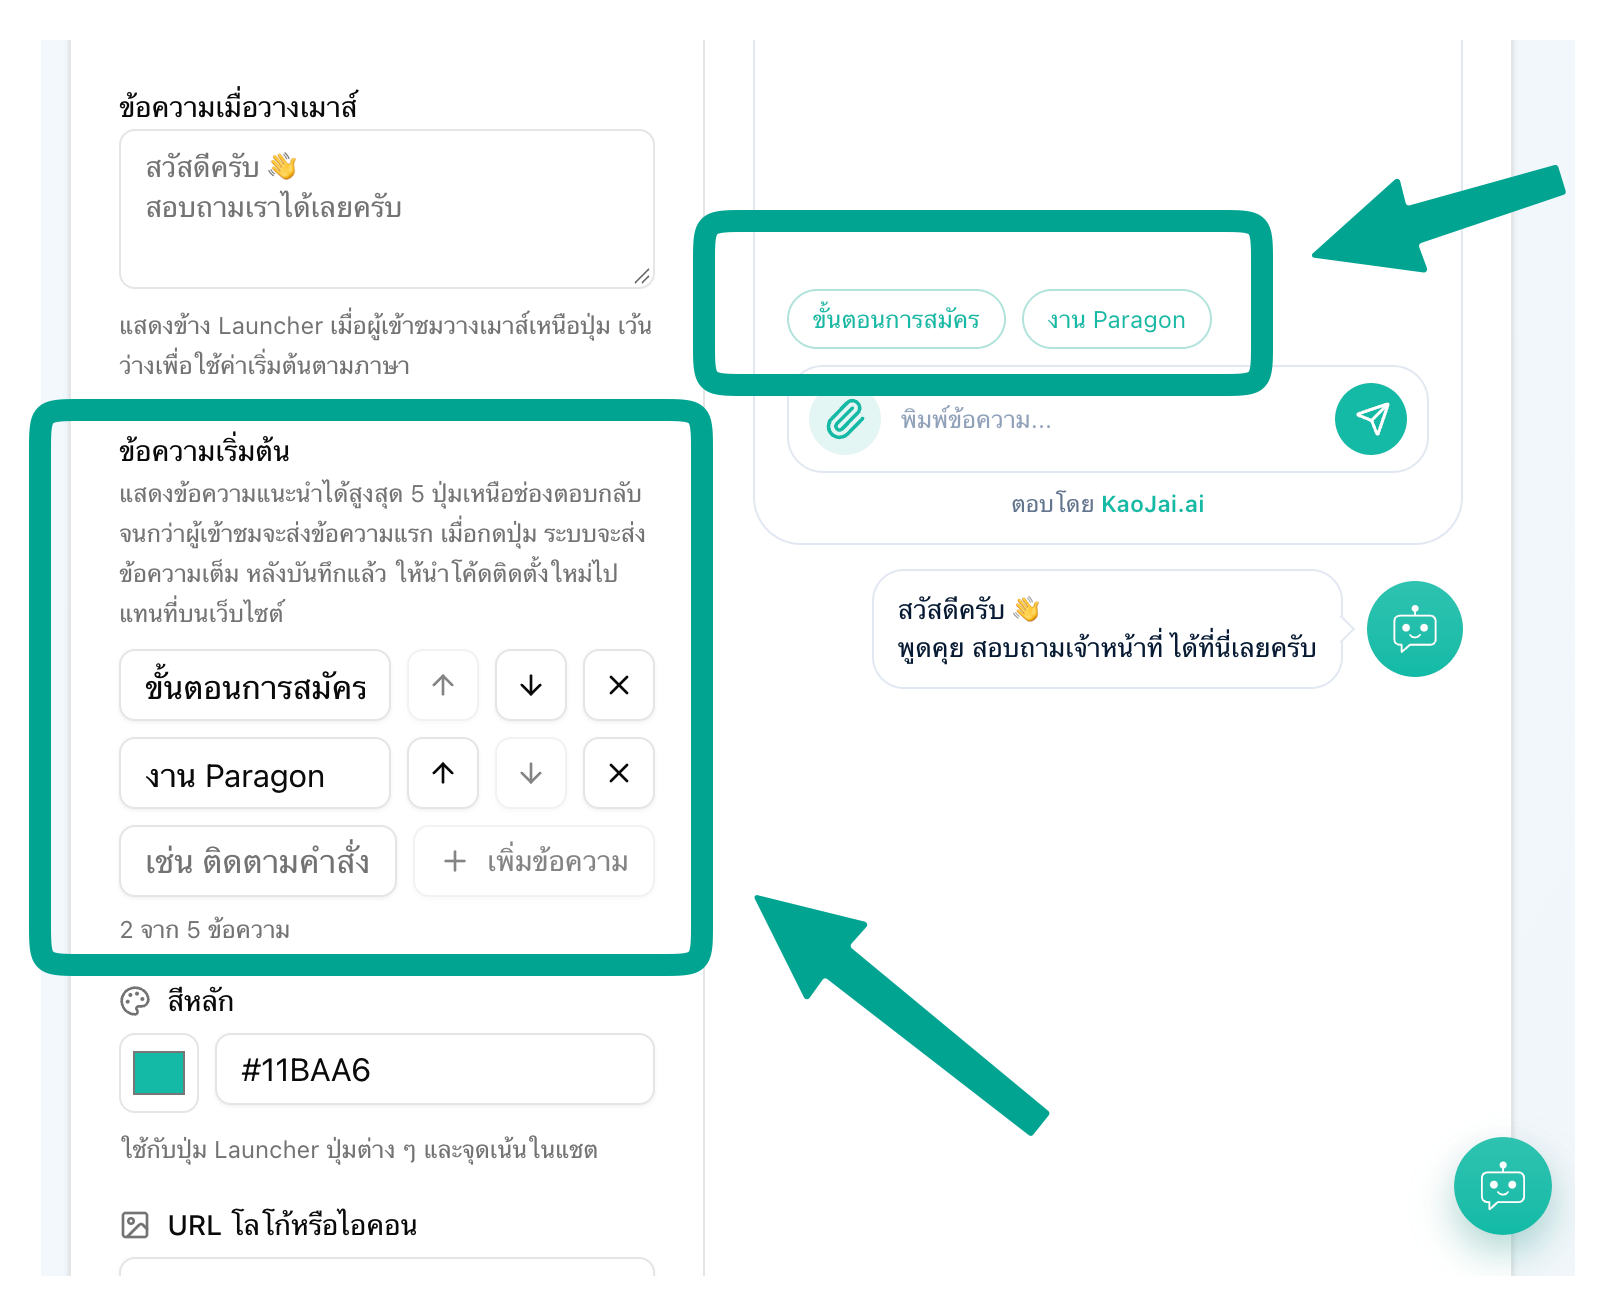
Add, reorder, or remove starter messages, then see how the buttons will appear to visitors.
Preview the experience before you install it
The Chat Widget page in Admin keeps settings and preview together:
- Select a Widget from the list.
- Adjust the title, subtitle, launcher message, color, logo, or starter keywords.
- Review the Desktop preview beside the settings.
- Select Show preview to open the mobile preview.
- Check the setup code, which updates from the current values.
- Save the Widget and copy the latest code to your website.
The preview shows the header, message area, starter buttons, launcher, and launcher message. This makes it easier to see the result before publishing.
The Admin preview and code update as you edit. After saving, recopy the latest snippet to update a website that already has the Widget installed.
Use separate Widgets for separate websites
If your business has more than one website, you do not have to use the same Widget everywhere. Create separate Widgets for your main website, campaign landing pages, or different brands.
Each Widget has its own ID and setup code, which lets you:
- Use different names and logos for each brand or campaign.
- Set allowed link domains for the right website.
- See where a conversation started.
- Remove or stop using one Widget without affecting the others.
Control which links visitors can open
In addition to the built-in allowed domains, you can add your own website domains in the Widget settings. This helps control which destinations can open from links sent in chat messages.
If you manage several brands or websites, set the domains for each Widget and check the generated code before installing it.
How to get started
- Open the KaoJai Admin Console and go to Integrations / Chat Widget.
- Create a new Widget or select an existing one.
- Configure the appearance, messages, and starter keywords.
- Review the Desktop and Mobile previews.
- Save the Widget and copy the setup code.
- Paste the code before the closing
</body>tag and publish your website.
For the full installation flow, read How to install the Chat Widget on your website. The code copied from Admin already includes the Workspace and Widget identifiers; never add a password or secret to it.
Frequently asked questions
Can I use my own shop logo?
Yes. Add an HTTP(S) image URL in the logo field. The image appears in the launcher and the chat header. If the field is empty or the image cannot load, the Widget uses the KaoJai logo instead.
Will the live website change as soon as I edit a setting?
The Admin preview and generated code update as you edit. The website uses the values in its installed snippet, so save the Widget and replace the old snippet with the latest code after making changes.
Do starter keywords stay visible forever?
No. They appear before the visitor sends their first message. Once the visitor starts the conversation, the buttons disappear so the chat area stays simple.
Summary
Chat Widget customization is not only about matching colors. It gives visitors a clearer starting point, makes the conversation entry feel like part of your business, and helps your team know which website or campaign brought the message in.
Start with the page where customers ask the most questions—pricing, services, or contact—then expand to other websites when you are ready. Make it easier for visitors to start a conversation in a way that feels like you. 💚